Etsy Loves

January 31, 2013


Etsy is a great online marketplace that offers both handmade and vintage items. I chose five of my favorite things to feature in this special edition of my usual five loves posts.   

1. Teal New Wave Purse | 2. Vintage 1955 Bright Red Royal Typewriter | 3. Vintage Index Tabs | 4. Vintage Brass Jaguar Brooch | 5. Vintage 70s Red Sunglasses

This post is in no way sponsored by, affiliated with, or paid for by Etsy. 

Alpha

January 30, 2013


I love typography. If you were to ask me if I liked decor or font more, I would probably say font. Unless of course the decor was on sale. My mother trained me well. Sadly, this is a custom art piece, not an attainable font. 

Golden Girl

January 29, 2013

 
I love gold. It's a neutral, it's a pop of color, it's chic. It flatters pretty much all skin tones. Nothing better than a sparkly gold shoe. I recently scored a gold satchel on sale at Target. (Cue Hallelujah Chorus.)

Lash Curling 101

January 25, 2013

Up to now, I've always just pinched my eyelashes at the base, and held for 10 seconds or something. But then I saw this awesome tutorial on The Beauty Department. And my whole world was changed. Trust me, you will never go back to the old way...EVER!

Pink Lemonade

January 24, 2013


I love this beautiful video from Paperfashion. Something about drifting on a watercolor pink lemonade sea reminds me of summer.

Sigh.

Why is it we all want winter in summer and summer in winter? These are the things that try mans' souls.

Spice Roasted Carrots

January 18, 2013


I don't know why, but lately I've been attracted to cozy foods. I mean, seriously, I find myself drooling over stews and soups in the fall and winter, and popsicles and sorbet recipes in spring and summer. 


Spice Roasted Carrots

You can imagine this spice blend would be great with lots of vegetables but those with natural sweetness like carrots and sweet potatoes are a natural fit.  Try roasting halved onions too, or cauliflower florets.  Depending on the size of your vegetables, watch the roasting time and toss them once during cooking.   

1 large bunch of fresh carrots, tops still attached
2 tbsp fruity extra virgin olive oil
1/2 tsp packed brown sugar 
1/2 tsp baharat spice blend (or more if you like)
1 tsp kosher salt
1/8-1/4 tsp cayenne pepper (add only if your spice blend does not already contain cayenne, check the label)


Preheat oven to 425 degrees Fahrenheit.  


Prepare carrots by chopping off the leafy tops and rinsing them well.  (If you like, peel them, but it is not necessary.)  If the carrots are medium-sized, chop them in half length-wise, but if they are large cut them into length-wise quarters.  If they are really long, cut them in half width-wise as well.  


Next, make the glaze by combining the remaining ingredients in a small bowl and whisking them together well.


On a rimmed baking sheet, spread carrots evenly, then drizzle with the spice glaze.  Using your hands or tongs, toss the carrots on the baking sheet until they are evenly coated with the glaze, then spread them out to roast them in a single layer.  Roast them in a preheated oven for about 7-8 minutes, until they are fragrant and beginning to brown.  Remove them from the oven, turn them over, and then return them to the oven to roast for an additional 7-8 minutes or until they are crispy and a dark caramel color.  Remove from the oven and serve immediately.

Yummy!

(Images and recipe from The Cilantropist)

Rebeca Raney x Madewell

January 17, 2013


So I was perusing around Madewell the other day and I stumbled upon their new collab with Brooklyn artist Rebeca Raney. Can I just say; I love this stuff. Pretty, colorful, happy....yeah. Right up my alley.


As I am writing this, I'm folding two loads of towels. Ah, such is the life of a multitasker.

1. Silk tee | 2. Llama necklace | 3. Cashmere sweater | 4. Hand painted tote 

Theo Altenberg

January 16, 2013

O.T. Oil on Cardboard 2009, No. 10

O.T. Oil on Cardboard 2009, No. 14

O.T. Oil on Cardboard 2010, No. 1

O.T. 2011, No.06

O.T. Oil on Cardboard 2009, No. 13

Art is one of those things that not everyone understands. I don't always love a piece of art that somebody else adores. But the work done by the artist Theo Altenberg captivated my attention immediately. So much movement. 

I wish I could do that. 

Be Thankful Garland

January 15, 2013


there's nothing i love better than a colorful garland. half of my time on etsy is spent looking at their fabulous garland selection. so, when i saw this delightful DIY from the poppytalk blog i knew it would be perfect for today's project.

materials:

1. 
papercute font (it's only $7! or you could do it the old fashioned way by hand)
2. scissors
3. felt scraps
4. dressmaking pins
5. Bias Binding
6. Sew machine or needle and thread
7. Ruler (optional)

Step 1: Print out your letters (I did two to an A4 sized page).
Step 2: Roughly trim around them and pin them onto your felt and cut each letter out.
Step 3:  Pin your letters onto your bias binding.
Step 4: Sew your letters onto your binding and you're done!

I have a sneaky hint....if you want to go the cheapo route, you could always use the free font Blackout...it's not exactly the same but it still would look great.

(Images and instructions from Poppytalk)

Five Loves

January 11, 2013

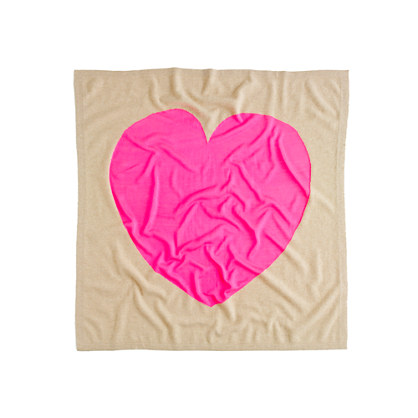
Collection baby cashmere blanket in heart me

1) j. crew's adorable baby collection...i love this cute blanket.

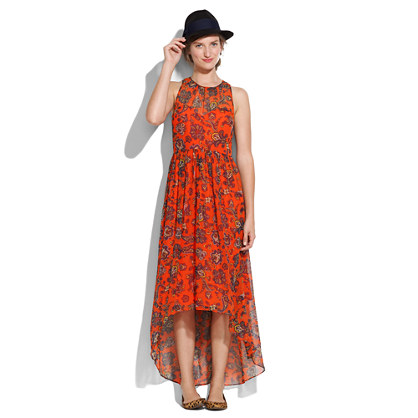
Paisley Flutter Dress
2) how pretty is this dress? imagine it with a big sunhat and a pair of sandals. ahhh, summer!

3) kate spade bobby pins. enough said.

1

4) crack caramel....i should really try to DIY this one of these days.


5) this pattern-ful pic from modcloth's instagram.

what are you loving lately?

Strength & Dignity

January 8, 2013

I prefer the wording... "She is robed in strength and dignity and she confidently faces the future." Love this. Reminds me of my mom and grandma.

one of my most favorite bible passages is proverbs 31. i love it in the message bible, as it says "she designs gowns and sells them, brings the sweaters she knits to the dress shops. her clothes are well-made and elegant..." of course, her good taste wasn't the only aspect that made her absolutely invaluable to her husband and family.

she always said the right things, and could be trusted in hard-core business deals. Tthis woman was no lamby doormat...she had no problem looking over a field or making sure everyone in her household was working their very hardest. but she was gentle, with a hand outstretched to the needy and a heart devoted to her family.

is your heart's desire to be a woman like that?

ban.do

January 7, 2013


i love ban.do. it's a company that offers colorful hair accessories, jewelry, and the like. talk about eye candy! plus, the stuff is really affordable. bonus point action.

{1. crystal crush bobbi, 2. sparkle shine bobbi set, 3. drinking the stars comb, 4. metallic mini pom pom flower, 5. pop flower, 6. ban.do bowtie}

Cherry-Vanilla Layer Cake

January 4, 2013


i usually try not to reblog stuff, because it tends to get monotonous. but for this, i had to make an exception. it's pretty. it's so pretty that it's been circulating the web, from the glitter guide tumblr to pinterest.
   

cherry-vanilla layer cake
serves 8-10                                                                                                         

maraschino cake:
1/2 cup unsalted butter
1 1/4 cups granulated sugar
2 cups all-purpose flour
1 tablespoon baking powder
1/4 teaspoon salt
1/4 cup whole milk
1/2 cup maraschino cherry juice
2 teaspoons almond extract
2 tablespoons flour for sprinkling over diced cherries
10 oz bottle maraschino cherries, finely chopped
drop or two of red food coloring, or americolor deep pink food coloring gel *optional
4 egg whites, beaten to stiff peaks
  1. preheat oven to 340 degrees.  grease two 7” spring-form pans (or one 9”) and line with parchment paper.
  2. beat the butter and sugar together in the bowl of a stand mixer until creamy.   in a separate bowl, whisk together flour, salt and baking powder .  combine milk,cherry juice and almond extract, and add alternately to the butter and sugar with the flour mixture.
  3. in a small bowl, sprinkle the 2 tablespoons of flour over the diced cherries and stir until the flour has been completely absorbed.  note: it’s okay if the cherries still have a little juice on them after this. 
  4. stir cherries into the batter.  stir in food coloring if desired
  5. fold stiffly beaten egg whites into the batter.  pour into prepared cake pans and bake for 50-60 minutes.   remove from pan and allow to cool completely on a wire rack.

vanilla swiss meringue buttercream frosting:
5 egg whites
1 cup sugar
pinch of salt
1 pound (4 sticks) unsalted butter, cubed, at room temperature
3 teaspoons clear vanilla extract
  1. set a saucepan filled one-third full of water over medium-high heat and bring to a simmer.
  2. whisk together the egg whites, sugar, and salt in a large heatproof bowl. set over the simmering water and whisk until the mixture is hot to the touch and the sugar has dissolved.
  3. transfer the mixture to the bowl of a stand mixer fitted with the whisk attachment.
  4. beat on low speed for 2 minutes. increase to medium-high until stiff peaks are formed.
  5. continue beating at medium-high speed until the mixture is fluffy and has cooled (the mixing bowl should feel cool to the touch).
  6. turn the mixer off and switch from the whisk attachment to the paddle. turn the mixer on medium-low and add the butter, a few cubes at a time, beating until well incorporated before the next addition.
  7. add the vanilla extract.  divide batter and tint with food coloring, if desired.  i kept a little un-tinted frosting out to pipe around the edges of the cake. to achieve my favorite blue/green tint, i used a dot each of sky blue and kelly green wilton gel food colorings.
  8. beat until the frosting is thick and completely smooth.
  9. store in an airtight container until ready for use. 
note: the heart topper is a piece of gum paste with a piece of clean, unused floral wire inserted through the center. the surface was brushed with corn syrup and dipped in multicolored sprinkles.

doesn't that sound wonderful? yummmm......

(images and recipe from sprinkle bakes)

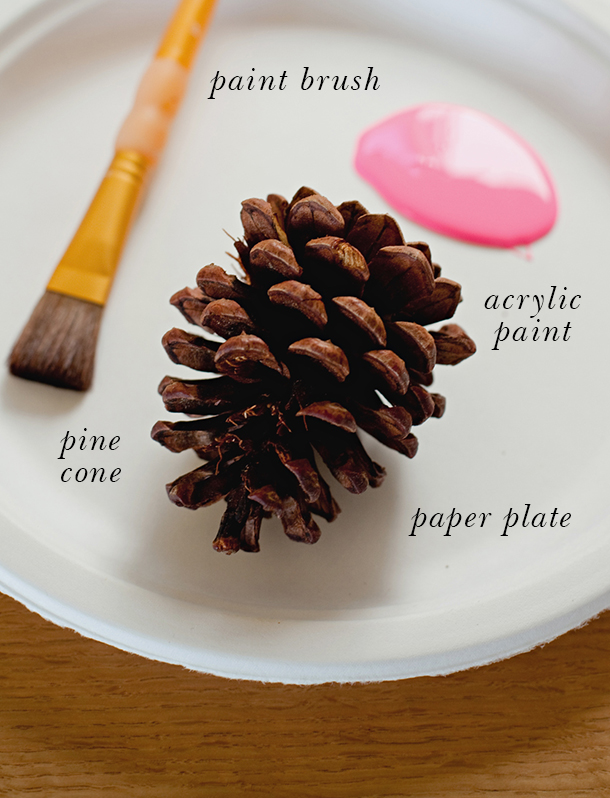
Neon Dipped Pine Cones

January 3, 2013

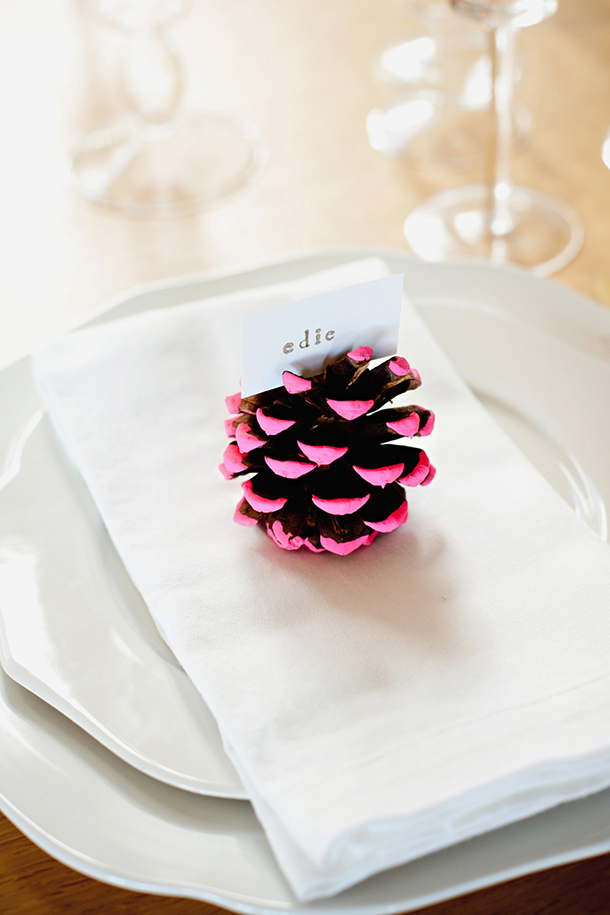
Neon Dipped Pine Cone Placecard Holder DIY | Camille Styles

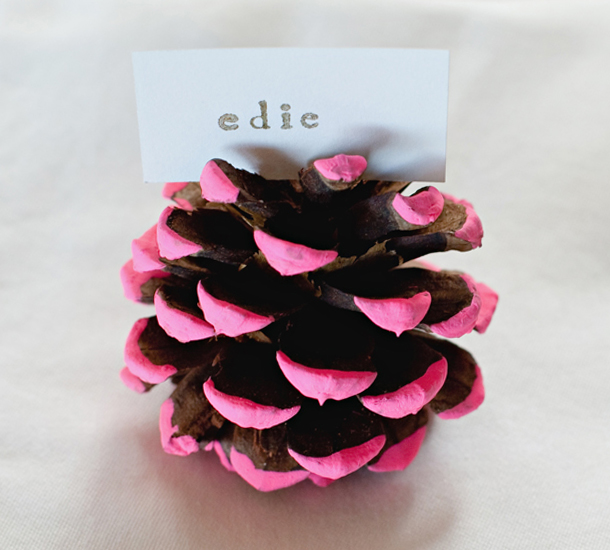
sometimes things you see on pinterest blow your mind. this is one of those amazing things. so, here i am, enthusing over an adorable pine cone placeholder.

Neon Dipped Pine Cone Placecard Holder DIY | Camille Styles

Neon Dipped Pine Cone Placecard Holder DIY | Camille Styles

using the paper plate to protect your table or counter, dab the tip of each prong of the pine cone with paint. for best results, make sure that you’re creating very thick applications of paint. let dry overnight. take a paper placecard and wedge in between prongs at the top of the cone. you should not need any adhesive for the placecard to stay in place.

go find your mind and get back to me. 

(images and instructions from camille styles)
Related Posts Plugin for WordPress, Blogger...